This guide is for users who are installing Send Individually for Microsoft 365 for themselves. If you are an IT Admin then you can follow these instructions on how to deploy Send Individually for Microsoft 365 to your users instead.
Installing the Send Individually for Microsoft 365 Outlook add-in is a simple process thanks to Microsoft’s modern technology.
Step 1: Start Outlook. In this guide we will be using desktop Outlook, but the process is the same both in new Outlook and in Outlook on the Web:
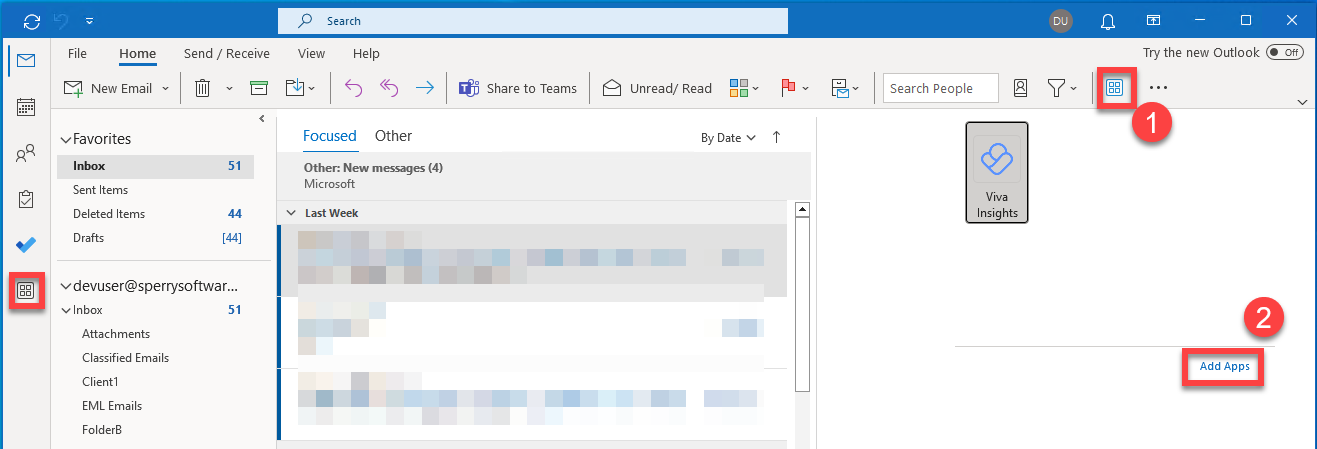
Step 2: Using the Apps button on the left of the main Outlook window or on the Apps toolbar button in Outlook, click on the Add Apps link:
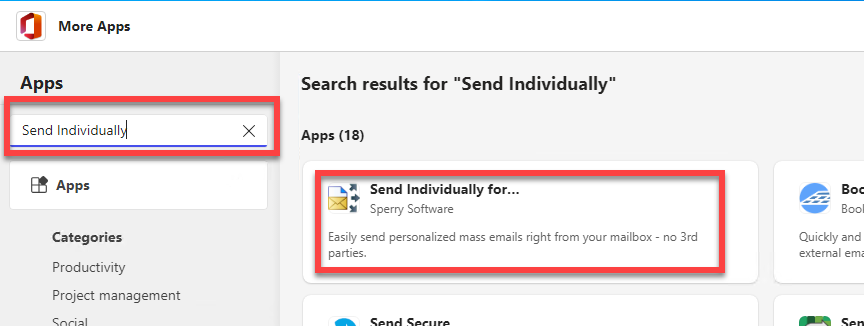
Step 3: You are taken to the Microsoft AppSource Apps store within Outlook:

Step 4: Search for “Send Individually for Microsoft 365”, then click on it:
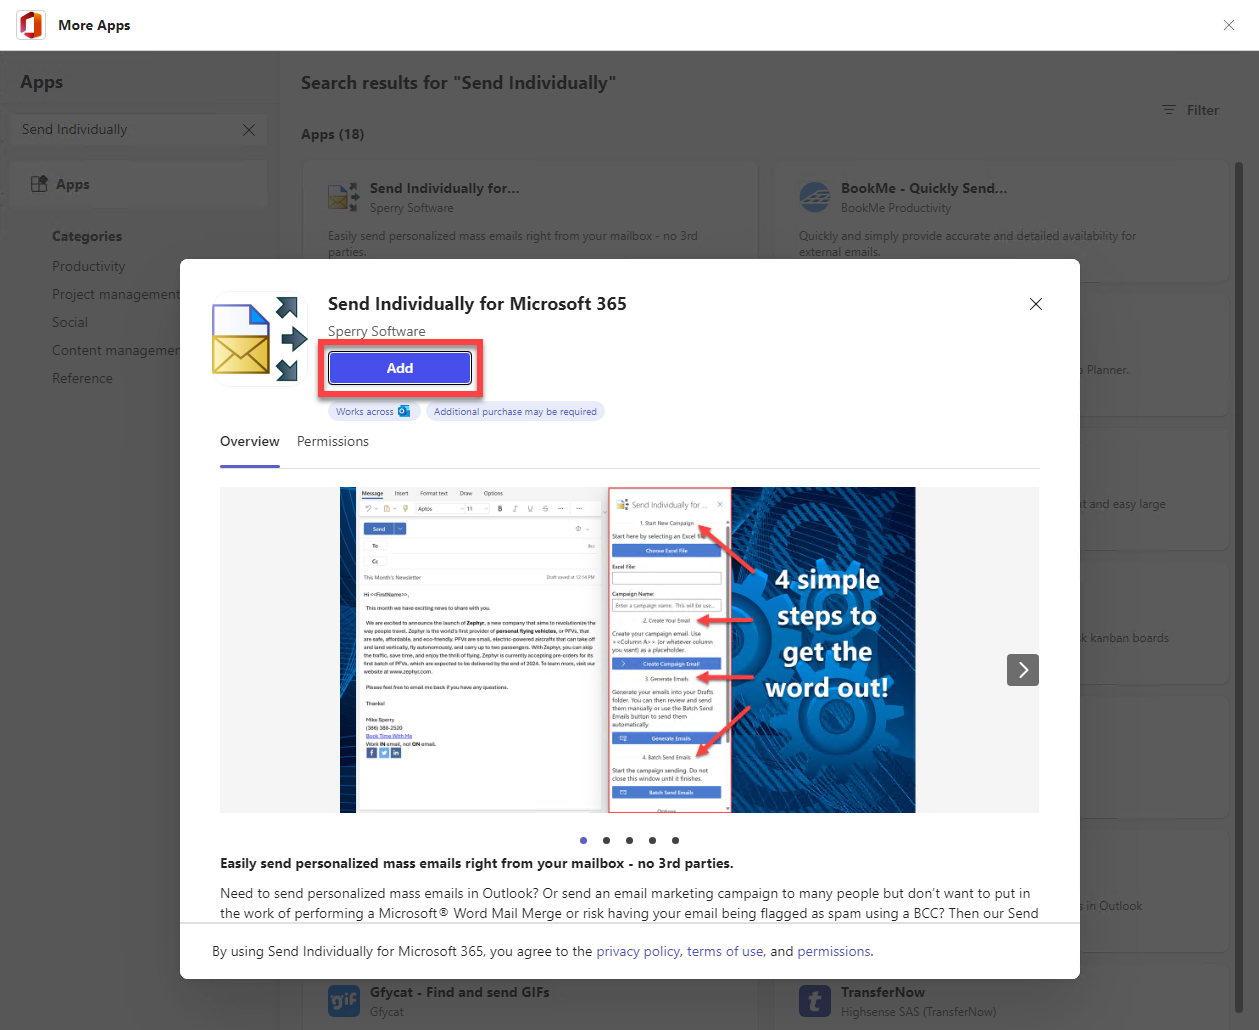
Step 5: Add the Send Individually add-in by clicking on the Add button:
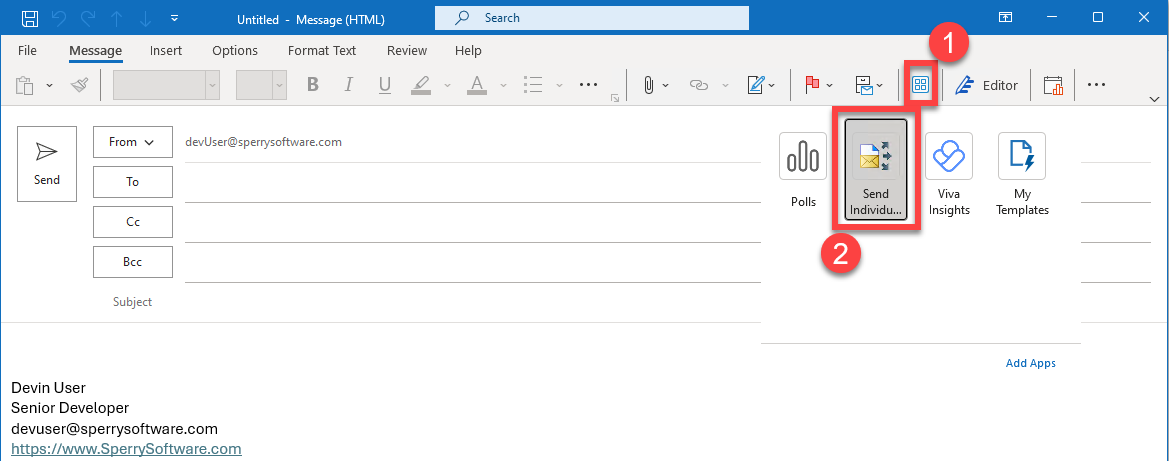
Step 6: After it’s installed, restart Outlook, compose a new email, then go back to the Apps toolbar button (1) and you’ll see the Send Individually for Microsoft 365 entry (2). Click on that next:
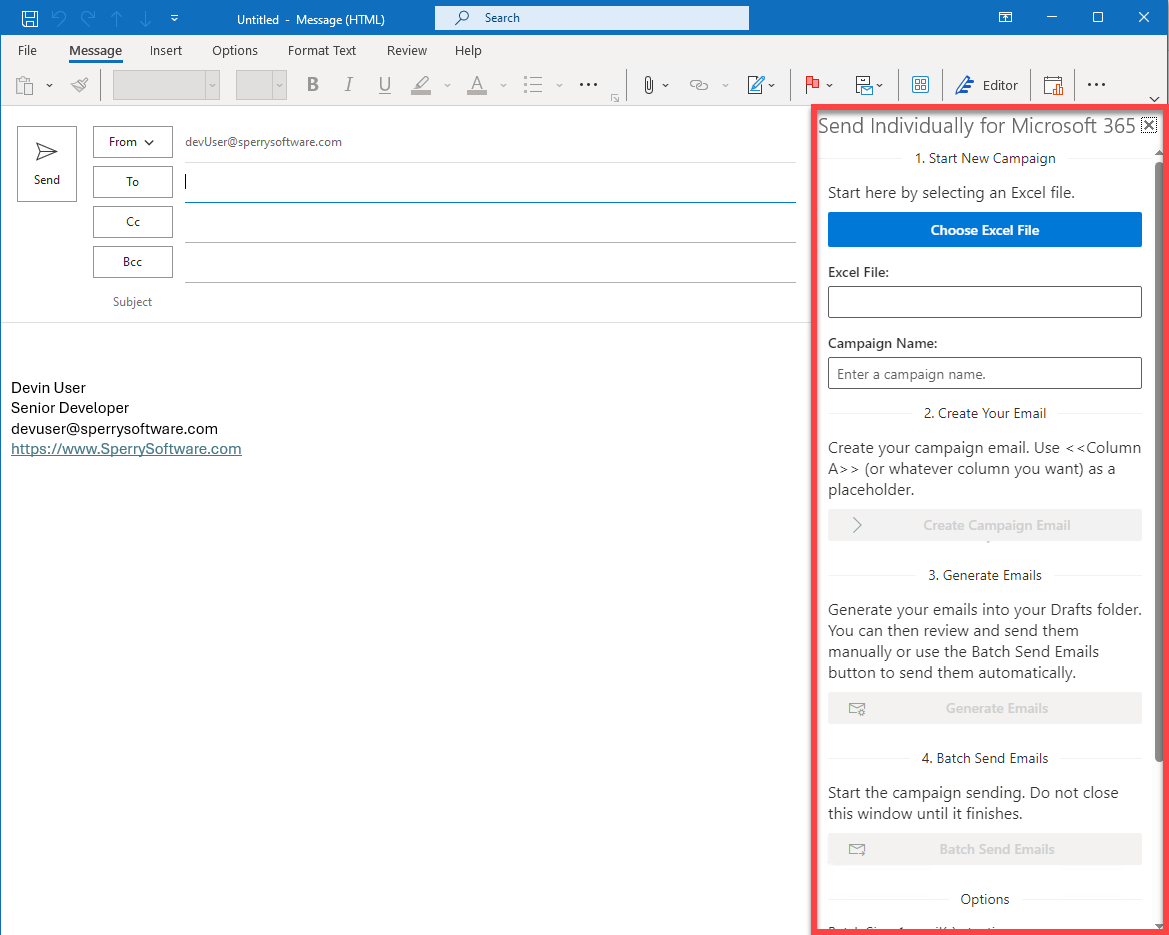
Step 7: The Send Individually task pane show now shows up:
Note: Be sure to compose a new email then click on the Apps button, otherwise Send Individually won’t show up because it’s designed to only show when you are going to send an email.
Finally, regarding licensing, the add-in will remain in Trial mode instead of Active mode. The license mode is shown at the bottom of the Send Individually pane.