Once your emails have been generated into your Drafts folder, and once you have reviewed them to be sure that they all look good, then you are ready to begin sending them.
Sending your emails is a simple process of clicking the Batch Send Emails button:
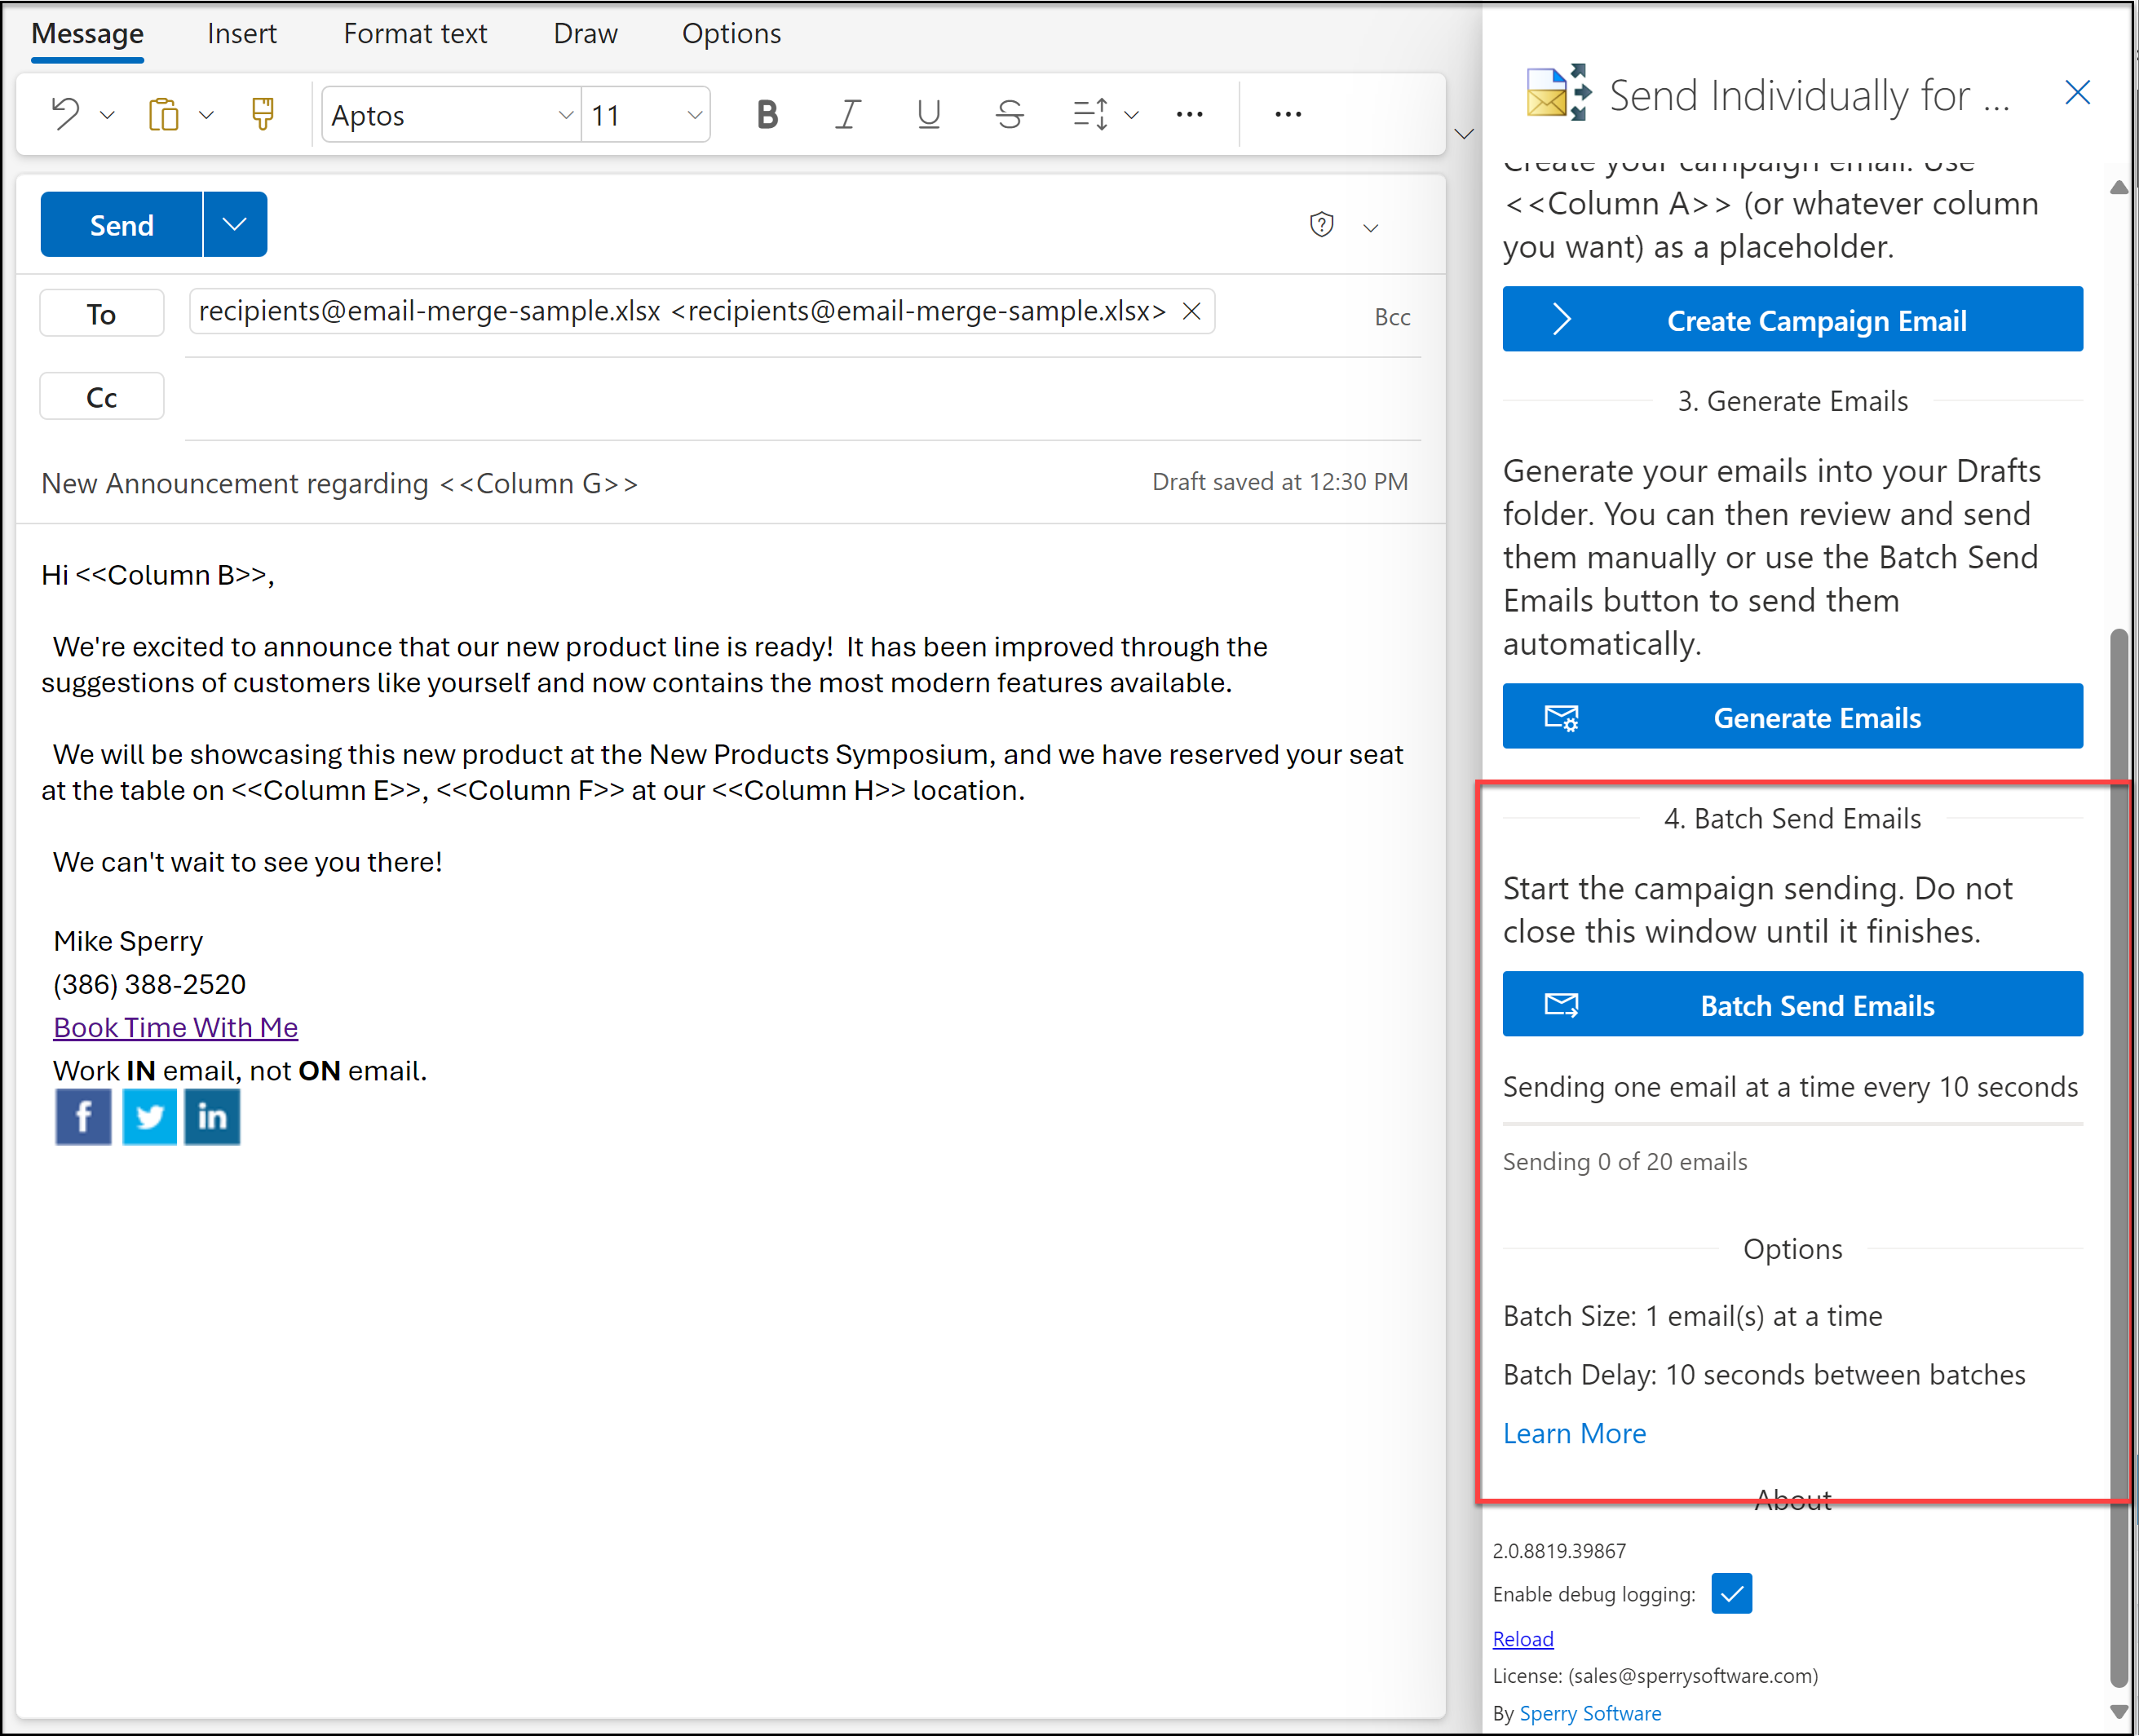
The add-in will begin sending the emails related to the campaign one at a time, and will delay sending for ten seconds between each time it sends exactly one email.
If you navigate away from this email while it is sending, the add-in will stop sending.
In order to resume (and it will resume where it left off, in case you need to logout or pause it for any reason), simply go back to your Drafts folder, then find the original campaign email. You can find it by looking at the recipients, and looking for the email that has a To field of “[email protected]”.
Once you open it and open the Send Individually task pane, the add-in will recognize that this email is associated with a campaign and will now have a single button that allows you to resume sending:
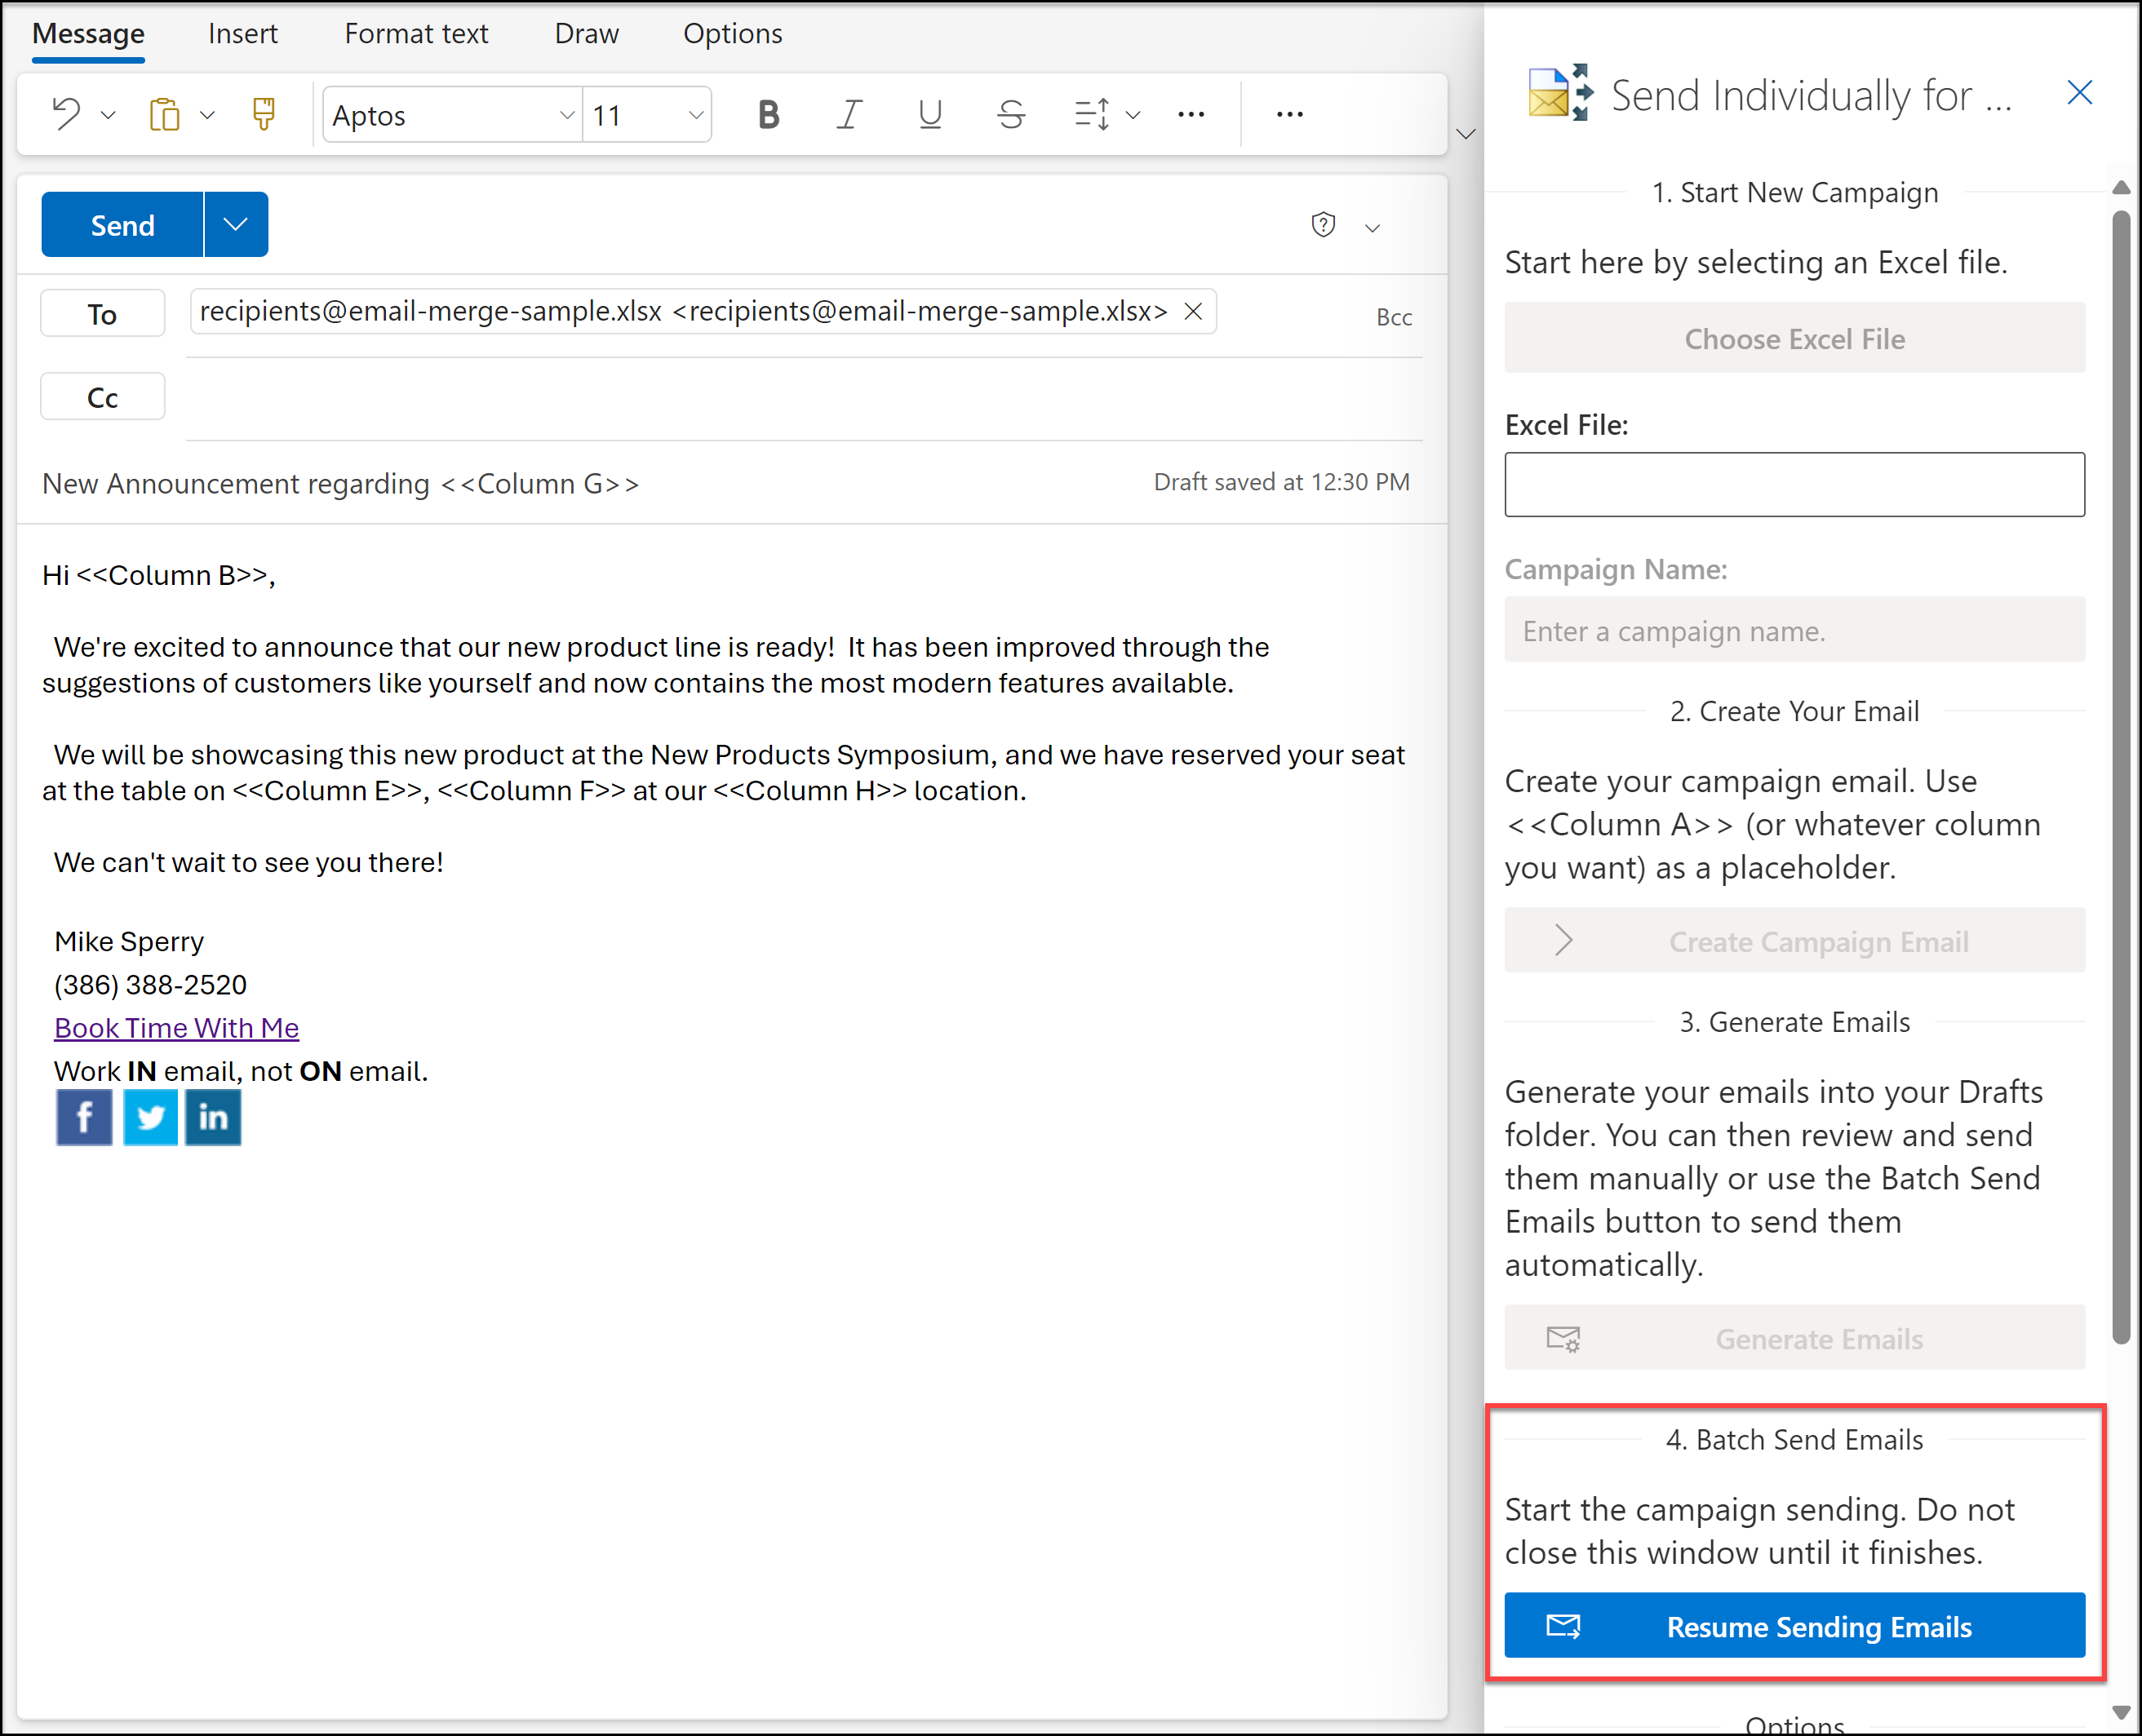
As mentioned, the add-in will pick up where it left off.
Because the Safeguard Send for Microsoft 365 add-in is sending directly from your email account, you can always view your Sent Items folder to review the emails that have been sent.
Once your campaign finishes, you can close and/or delete your campaign email. If you choose to run another campaign, keep in mind that you do not want to exceed sending limits as described in the overview. It is imperative that you not exceed these account maximums otherwise Microsoft will block your email account and you will not be allowed to send emails at all.
See Also:
Prev: Generating Your Personalized Emails
Back To Grow Your Business Overview