When preparing your campaign, the first thing to do is to create an Excel file that holds the email addresses of your recipients, along with any other information that you want in the email.
We have created a template campaign Excel file to help you get started:
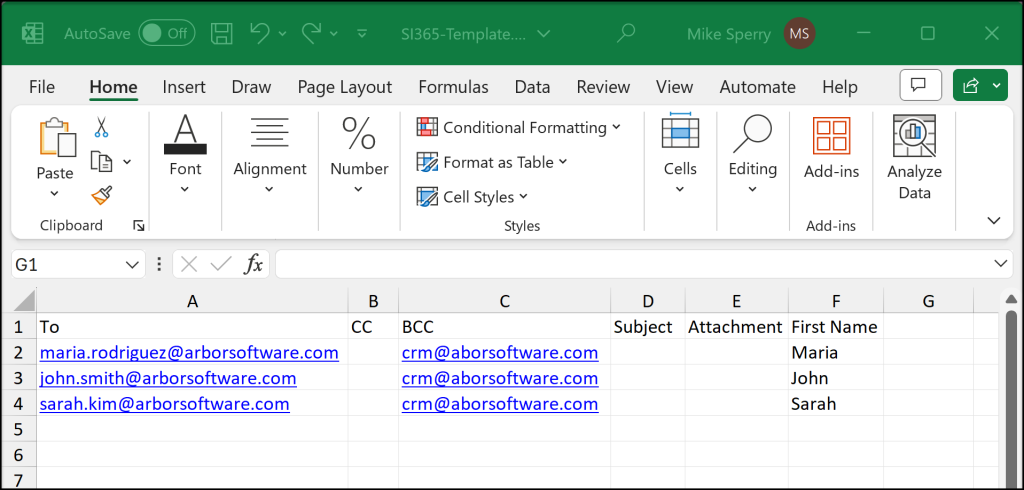
When you open it, you can see that it’s populated with a few samples from our fictitious company, Arbor Software. In general, the first row, or header row, contains the name of the column. You can reference the column by the header row name in the subject or body of your email by using <<First Name>> for example, or by simply using the column letter <<Column F>>. Both of these reference the same column.
Notice that the data is on the first spreadsheet. This is the default and the add-in will only read the first spreadsheet.
Let’s go over each column in detail.
The first column is the To column. This the email address of who you are sending to. Simple.
The next column is the CC – anyone who you want to include as a CC recipient. Like the To filed, it is expected to be an email address.
Next is the BCC column. This column should also contain an email address, and like the sample shows, it can be useful to BCC your CRM so that you can keep track of what emails you sent to who and when.
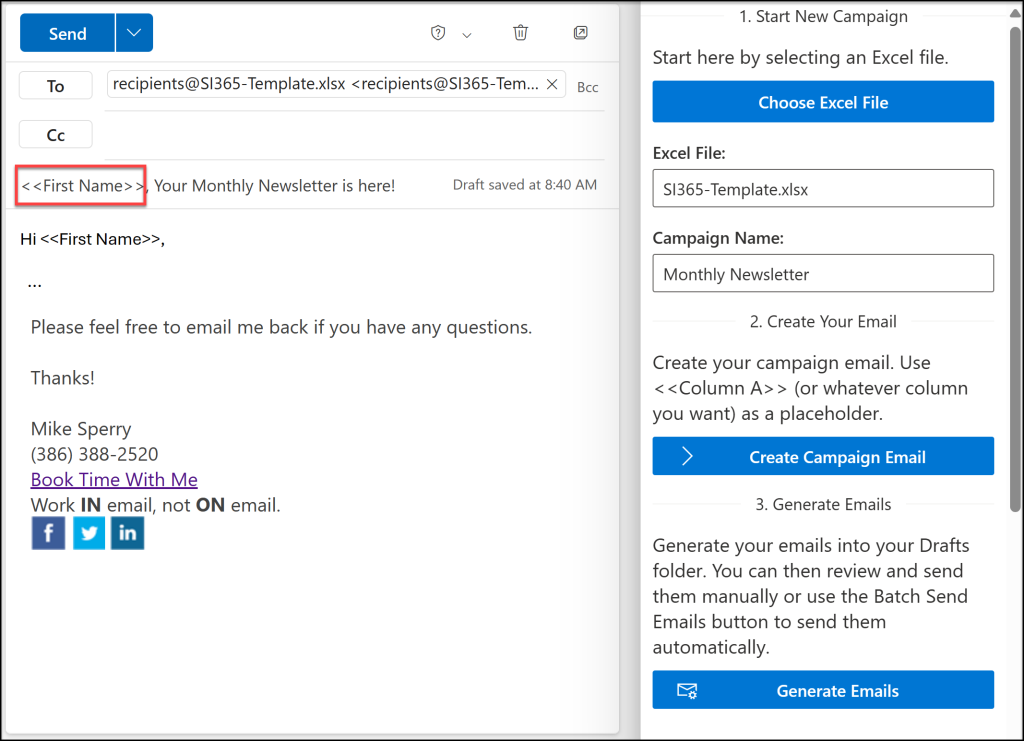
The Subject column is special in that you can generate a completely different subject for one or all of your recipients by simply typing in your desired subject. If left blank (as shown), the add-in will use your regular campaign email subject. Keep in mind that really there are two ways to personalize the subject: You can either supply a subject that you generate in each row as we just mentioned, or you can use the substitution text right in the subject field of your campaign email just as you would in the body. For example to get each person’s first name in the subject, you could do so like this:
The Attachment column is reserved for future use. Today you can add one or more attachments to your campaign email (using Outlook’s typical attachment methods) and a copy will go to each recipient just like you would expect. In the future, we will allow you to send each recipient their own file as an attachment. This might be useful for sending personalized schedules that get generated each morning, or perhaps a realtor might want to notify potential home buyers about a house listing in a particular zip code.
The next column in our sample is Column F, but we have named it “First Name” to help with staying organized. As mentioned, you can reference the column by either the name you give it or by <<Column F>> (or <<Column G>>, etc.). Note that the maximum columns you can have is <<Column Z>>, even though Excel might support up to Column ZZ. In other words, the add-in can only read the first 26 columns (which implies that the maximum number of personalized columns you can have in any one campaign email is 26.

