Once your Excel file with your recipients and substitutions are ready, the next step is to create your campaign email.
This step is actually two parts, where you specify the Excel file and give your campaign a name, and then actually crafting your email message.
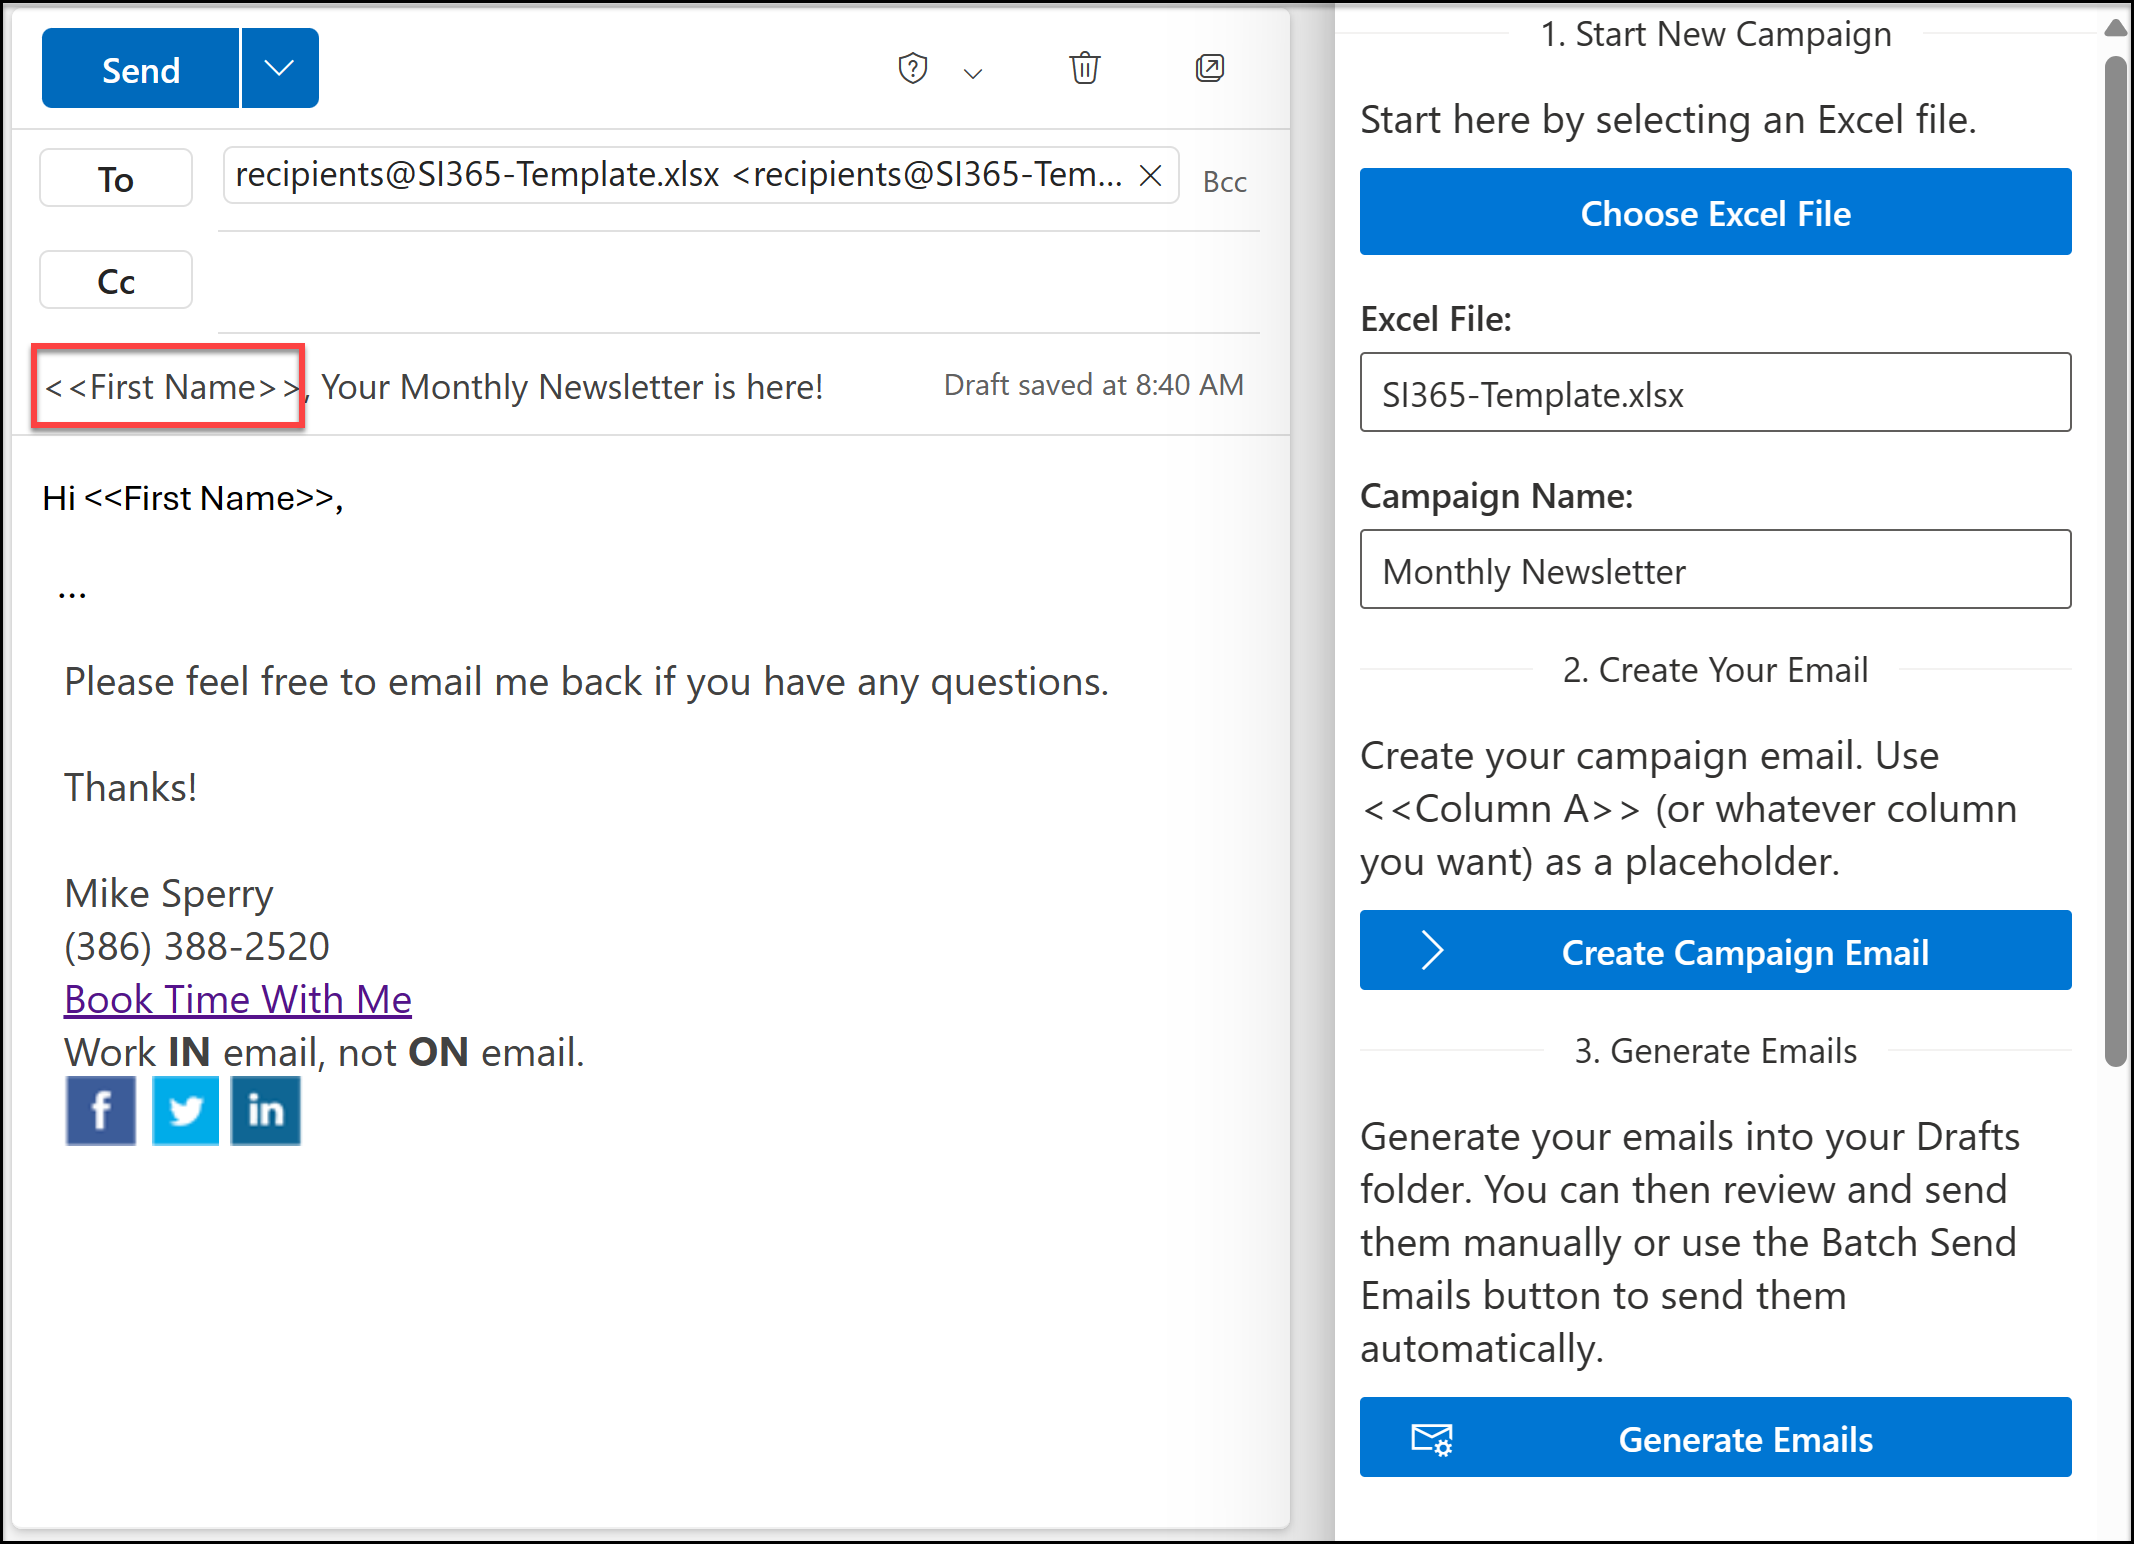
The first part is simple, just choose the Excel file you’ve been working on, give your campaign a name, then click the Create Campaign Email button. This is an important step as it registers this email as the main campaign email and also takes the Excel filename and prepends a “recipients@”. It does this to both allow you to more easily recognize the main campaign email when viewing it in your Drafts folder, and also prevents Outlook from sending it by accident. Finally, this step also establishes a connection to your email account, which is a necessary part of both the Generate Emails and Batch Send Emails steps.
The next part of this step is to craft your message.
The Send Individually for Microsoft 365 makes this a simple step by allowing you to compose the email right in Outlook.
You probably already know best how to word what you want to say, but one thing we want to add is that when it comes to any personalization you’d like to see in the subject or body of the email, as mentioned simply use the <<Column F>> syntax. Or, if you’ve given the column a name, then you can use that – for example, here we have an informal newsletter that simply uses the first name in the subject and salutation:
See Also:
Next: Generating Your Personalized Emails